Utilizing ADB for daily tasks
If you're developing Android apps, you might often wonder how does our PC communicate with the Android devices when we debug. Well, the answer is through the Android Debug Bridge, adb for short.


If you're developing Android apps, you might often wonder how does our PC communicate with the Android devices when we debug. Well, the answer is through the Android Debug Bridge, adb for short. When you run your app, the computer install the debug apk with adb install and launch the app with adb am start (am stands for activity manager more on that belows). But there's more to adb than that meets the eyes, in fact, some of the commands can help your day-to-day activities.
Installing ADB
First thing first, try running adb in your terminal to make sure it's installed on your system. If you see something along the line of command not found, that means adb is not installed yet. For MacOS, running brew install android-platform-tools should be okay. For the rest (and for MacOS as well if you prefer manual) you can follow these steps
- Download platforms-tools here
- Unzip it somewhere you want to keep it (preferably
~/Android/platform-tools) - Then in your shell config (
~/.bashsrc,~/.zshrcetc.) Add the following lines (For Windows, you might need to add the path insideSystem variables) :
export PATH=${PATH}:$YOUR_EXTRACTED_PATH/platform-toolsWe will have to reload the shell (close and open terminal) afterwards.Then try running adb again. If it works, then we can continue ahead to explore some of its usefulness.
Setting up Debugging
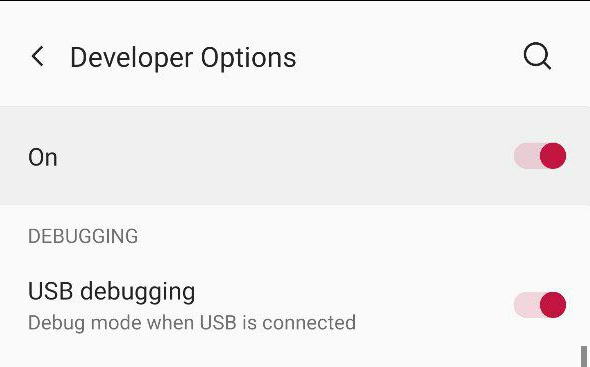
If you're using a physical device, you will need to enable USB debugging in the device. First, enable Developer Options by going into System => About, and tap Build Number seven times. Some devices has different ways to enable Developer Options, so Google for your device if the common step doesn't work. Afterwards, go into Developer Options and enable "USB Debugging".
Then, plug your device into your PC and execute adb devices in the terminal. See if your device name pops up.
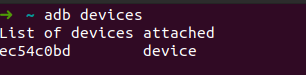
If it doesn't, it could either be your PC not recognizing your device (especially on Windows where you will need a driver) or USB Debugging has not been enabled. If this is your first time connecting through adb, you might also need to authorize your PC in your Android device which should shows up with a pop-up dialog. Don't worry, you can revoke the access in Developer Options later. If your device is showing up after adb devices, then we can proceed.
If you want to go one step further, we can setup in a way USB cable is obsolete. You can enable Wireless ADB Debugging in Developer Options. After that,
- Connect your device to PC with USB
- Run
adb tcpip 5555to make it listen to port 5555. - Run
adb shell netcfgoradb shell ifconfigto see your Android device's IP - Disconnect USB
- Run
adb connect $DEVICE_IP:5555to connect to your device wirelessly
Make sure to run adb usb after as leaving it open in the (especially public) network is dangerous
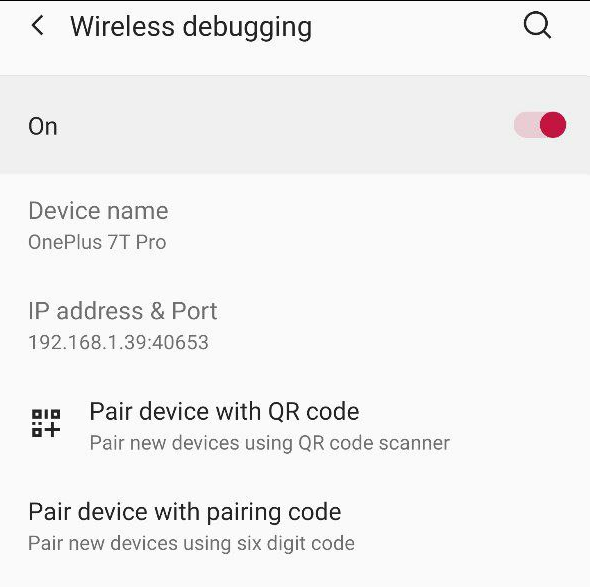
On Android 11 and above, Android now has a function to make wireless debugging easier where a device can pair wirelessly with pairing code or QR code without the need of plugging into the PC for the first time. Tap on Wireless Debugging and it will shows you a similar screen as follows:
Tap on "Pair device with pairing code and you will see a popup similar to the one below:
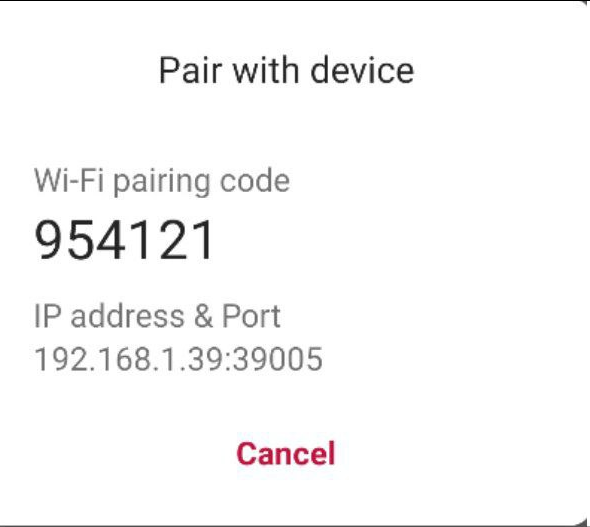
Go to terminal and run adb pair $DEVICE_IP_AND_PORT $PAIRING_CODE. It should connect your phone wirelessly by now.
~ adb pair 192.168.1.39:39005 954121
Successfully paired to 192.168.1.39:39005 [guid=adb-ec54c0bd-nyDhpf]
Push & Pull files
If you ever been on a Mac, you would be familiar with Android File Transfer. And for Linux and Windows, we can manually find the file and copy paste it onto our computer. However, I prefer transferring file through adb since it saves me the hassle of having to connect with USB.
If we want to transfer from my PC to the device, we can utilize adb push command.
adb push $FILE_IN_YOUR_PC$ $PATH_IN_YOUR_DEVICE$For example, if I want to push a document into device, I can run
adb push ~/document.txt /sdcard/document.txtReversibly, We can execute adb pull for transferring from device to PC.
adb pull $FILE_IN_YOUR_DEVICE$ $FILE_IN_YOUR_PC$
adb pull /sdcard/document.txt ~/document.txt
With adb, you don't need to use cables, emails, AirDroid or any other tools for you to transfer to/from your device again.
Automating login
adb can also be used to automate filling forms when you're doing manual testing. adb allows you to send input commands to the device. These inputs could be either just tapping, typing text or sending a key event like ENTER, TAB etc. Let's take a look into this scenario where I would need to type user1 and password1.
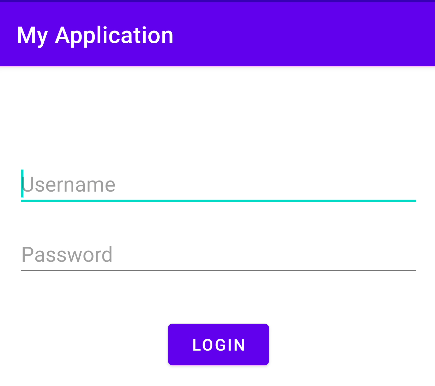
We can input text onto the username or password fields with the following command
adb shell input text $YOUR_TEXT$
adb shell input text user1 && adb shell input text password1
If you run the command in the terminal, you will see that it's not exactly right. password1 is being appended after the end of user1. That's because we haven't shift the focus of the text input yet. We have to switch it from username input to password input. To do this, assuming you have proper nextFocus attributes in your inputs, we can send a TAB_EVENT to the device to switch between inputs. You can find all the possible input event codes here and if you scroll down, you will see KEYCODE_TAB is set to 61. For key event, we have to use input keyevent $KEY_EVNET_CODE. It would looks like this
adb shell input keyevent 61If we combine all of these, we will have the following one liner that will automatically type the credentials for our testing account
adb shell input text user1 && adb shell input keyevent 61 && adb shell input text password1
If you have captured the ENTER key event to start login, we can even use input keyevent 66 to press Enter, and start login with zero manual tap. Personally, I make an alias in my shell config because it reduces time for me in the long run. Plus, it looks like magic in presentations and demos when you see a small command like testAccountLogin being executed and everything just works.
alias testAccountLogin = adb shell input text user1 && adb shell input keyevent 61 && adb shell input text password1I have said that the above example assumed that you have proper nextFocus attributes in your inputs. But what if you're testing for a third-party app and the app doesn't really has proper nextFocus? How do we automate switching between the inputs? No worries, we can still use input tap $X_VALUE $Y_VALUE to tap the screen. There's two ways, the first one involve
- Run
adb shell getevent -lin the terminal to log the input events - Manually press your input field
- Check if there's
ABS_MT_POSITION_XandABS_MT_POSITION_Yin the terminal - Copy the value (they should be in hexadecimal)
- Convert the values into decimal value
- Run
adb shell input tap $DECIMAL_X $DECIMAL_Yto see if it's click on the input field
This involves some complex steps, so, I prefer to use more straightforward way.
- Open Developer Options
- Enable
Input > Pointer Options - Check if you can see numbers at the top of the screen
- Hold your finger or put the cursor over the input field
- Copy the x, y value (usually at top left corner of the screen)
- Run
adb shell input tap $dx $dyto see if it's click on the input field
In our example, I can also use tap command to do the same thing
adb shell input text user1 && adb shell input tap x y && adb shell input text password1This works for anything on the screen, including buttons. A full command that includes tapping loign button would be as follows:
adb shell input text user1 && adb shell input tap x y && adb shell input text password1 && adb shell input tap x y
Screenshot and video record
Another common task is taking screenshots and recording video. These are useful when you want to report an issue and want to show the replication steps clearly. Let's start with screenshot first.
adb shell screencap $PATH_IN_DEVICEFor example, we can run adb shell screncap /sdcard/our_screencap.png. We can then execute adb pull /sdcard/our_screencap.png to pull the screenshot into our PC.
For video recording, we can execute
adb shell screenrecord $PATH_IN_DEVICEWhen we're done recording, we can press Ctrl+C (or Command+C on MacOS) to stop the recording. Similar to above, we can also run adb pull to pull the file onto our development PC after recording. Additionally, we can provide options such as resolution, bitrate, time etc. You can browse these options here. Do note that there are limitation to this approach such as you cannot rotate the screen during recording and that audio won't be captured.
Testing DeepLinks
Deep links are one of those few things tedious to test because manually, you have to click on the links in some third party app to see if your app is correct in handling the links. We can remove this need of third party apps by testing this function through the use of adb. As mentioned in this documentation, you can run the following command
adb shell am start
        -W -a android.intent.action.VIEW
        -d <URI> <PACKAGE>

adb shell am start
        -W -a android.intent.action.VIEW
        -d "example://gizmos" com.example.android
To break this command down,
ammeans activity manager. To make it simple, in Android, each app has anactivityor multipleactivitiesthat hosts the UI that the user can see. Activity Manager knows which apps has which activities and we can launch specific screen/activity through the activity manager.-Wmeans wait for the launch to be completed.-a android.intent.action.VIEWis where we specify the action that we want to execute. In Android, we have predefined actions that the OS understand and the OS can use this information to route the acti0n to the corresponding apps. If you ever open a file and wonder where all of these apps are coming from in the popup, then the answer is through this OS feature. The OS knows which app can handle which file, i.e, which action.-d <URI> <PACKAGE>: destination specify two parameters, first is our deep link uri, and the second one is the app we want to view this deeplink on. For the first one, replace with the link you want to test, and for the second, you can enter your app's package name.
If you run that command, the OS should launch your app. First, OS will first ask the app if it can handle this type of deep link. If the app can handle the deep link, it will receive the deeplink, and now the app is responsible for dissecting the deep link and manage it.
Knowing these adb commands helped a lot for me and I hope this helps you in your development as well. As a next step, take a look into ADB Documentation for even more detailed explanations. Feel free to let me know your adb tips & tricks, I'm all ears!